Upgrading Drupal from 8.x/9.x to Drupal 11: A Comprehensive Guide
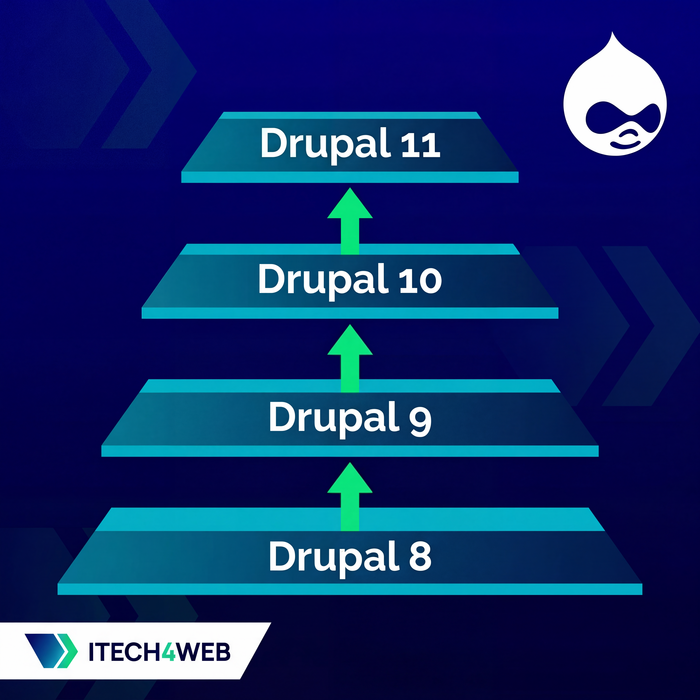
Table of Contents:
If you're running a Drupal 8 or Drupal 9 site and wondering how to get to Drupal 11, you need to understand that there is no direct upgrade path. The journey from these older versions to Drupal 11 requires a methodical, step-by-step approach that respects Drupal's architectural evolution over the years. This guide will walk you through the entire process, highlighting the critical checkpoints and potential pitfalls along the way.
Understanding the Upgrade Path
The first thing you need to accept is that Drupal upgrades from version 8 or 9 to version 11 cannot be done in a single leap. Instead, you'll need to upgrade through intermediate versions, essentially hopping from one major version to the next closest one that your current installation can reach. For example, if you're running Drupal 8.6, you'll first need to upgrade to the latest Drupal 8 version, then to Drupal 9, then to Drupal 10, and finally to Drupal 11. Each of these steps requires careful preparation and testing.
The upgrade strategy depends entirely on where you're starting from. If you're on an early Drupal 8 version like 8.4 or 8.5, you'll have more steps to navigate compared to someone starting from Drupal 9.5. The key principle is to always upgrade to the highest possible major version before attempting to jump to the next major release.
Back to topPreparing for the Upgrade
Before you even think about running composer commands, you need to prepare your codebase. Start by using composer to upgrade to the latest possible version within your current major release. For instance, if you're on Drupal 8.7, upgrade to the latest 8.x version available. This is accomplished with a simple composer upgrade command, which will bring all your dependencies to their latest compatible versions within the constraints defined in your composer.json file.
However, the more critical preparation step involves reviewing your installed modules. Over time, projects accumulate modules that were installed for testing or features that never made it to production. Now is the time to disable and completely remove all unused modules from your composer.json file. This not only reduces the complexity of your upgrade but also minimizes potential conflicts with modules that may not be compatible with newer Drupal versions.
If you're feeling overwhelmed by the module audit process or need expert guidance on what's safe to remove, iTech4Web can help. Our team has extensive experience optimizing Drupal installations before major upgrades. Contact us to discuss your project.
Back to topHandling Incompatible Modules
One of the most challenging aspects of upgrading to Drupal 11 is dealing with contributed modules that haven't yet been updated for compatibility. If your site depends on a module that's not available for Drupal 11, you have several options. The most elegant solution is to temporarily host a patched version in a custom repository within your composer.json file.
Here's a practical example using the Advanced Aggregation (advagg) module. If the official release isn't ready for Drupal 11 but there's an active issue with a patch, you can add a custom repository definition to your composer.json:
{
    "type": "package",
    "package": {
        "name": "drupal/advagg",
        "type": "drupal-module",
        "version": "6.1.0",
        "source": {
            "type": "git",
            "url": "https://git.drupalcode.org/issue/advagg-3537399.git",
            "reference": "3537399-drupal-11-compatibility"
        }
    }
}
Once this repository is defined in your composer.json, you can require the module as you normally would with composer require drupal/advagg. This approach allows you to proceed with your upgrade while the community works on official releases, and it gives you a clear migration path back to the official version once it becomes available.
Critical Version-Specific Considerations
As you navigate through different Drupal versions, certain architectural changes require your attention. Understanding these changes ahead of time will save you significant troubleshooting effort later.
Path Alias Module (Drupal 8.8+)
If you're upgrading from any Drupal 8 version before 8.8, you need to know that the Path Alias core subsystem was extracted into a separate module called "path_alias". During the upgrade process, this module will be automatically installed, and your existing path aliases will be migrated to use the new system. While this process is generally smooth, you should verify after the upgrade that all your URL aliases are working correctly, especially if you have custom code that interacts with the path system.
Claro Admin Theme (Drupal 9.4+)
When Drupal 9.4 was released, it introduced Claro as the new default backend theme, replacing the long-standing Seven admin theme. While Seven continued to be available in Drupal 9, this change signaled a shift in Drupal's administrative interface design. It's highly recommended that you switch to Claro before moving forward to Drupal 10, as this will help you identify any administrative interface customizations that need updating. You can make this switch at any point during your Drupal 9 journey, and it will make the subsequent upgrades much smoother.
Seven Admin Theme Removal (Drupal 10)
The removal of the Seven admin theme from core in Drupal 10 represents a more significant change. If your site or your content editors depend heavily on Seven's interface, you'll need to install it as a contributed project from drupal.org/project/seven. This should be done during your Drupal 9 to Drupal 10 upgrade process. However, this is also an excellent opportunity to consider whether moving to a more modern admin theme like GIN might be beneficial for your team in the long run.
CKEditor 5 Migration
The transition from CKEditor 4 to CKEditor 5 is perhaps the most complex upgrade consideration you'll face. CKEditor 5 was first introduced as an experimental module in Drupal 9.3, became the default text editor in Drupal 9.5, and is now the only text editor included in Drupal 10 and 11 core. This progression gives you several opportunities to manage the migration.
The optimal strategy is to upgrade to CKEditor 5 while you're still on Drupal 9.5. This allows you to address any text formatting issues or missing functionality while you still have the option to roll back if needed. The upgrade path from CKEditor 4 to 5 involves more than just enabling a new module. CKEditor 5 has a fundamentally different plugin architecture and configuration system, so you'll need to review all your text formats and ensure that any custom buttons or functionality you've added are available in CKEditor 5.
If you absolutely must upgrade to Drupal 10 before completing the CKEditor 5 migration, you can install the contributed CKEditor 4 module from drupal.org/project/ckeditor when requiring Drupal 10. However, this should be considered a temporary measure, as CKEditor 4 is no longer receiving security updates, and the contributed module is meant only as a bridge solution.
For sites that relied on specific CKEditor plugins, such as the word count functionality, you'll need to find alternatives. The ckeditor5_plugin_pack module (drupal.org/project/ckeditor5_plugin_pack) is an excellent solution for Drupal 11, as it can replace several unsupported plugins including ckeditor5_wordcount and ckeditor5_word_count. The plugin pack provides more comprehensive functionality for both word counting and character counting, along with additional useful features that enhance the editing experience.
Navigating the CKEditor 5 migration can be tricky, especially if you have heavily customized text formats or custom plugins. iTech4Web specializes in smooth Drupal upgrades that maintain your site's functionality throughout the process. Let us handle the technical complexity while you focus on your business. Reach out to us to discuss a project.
Back to topUpgrading Custom Code
Your custom modules and themes are just as important as contributed code, and they need to be updated to work with Drupal 11's APIs. Fortunately, the Drupal community has developed excellent tools to help identify deprecated code and incompatibilities.
The Upgrade Status module (drupal.org/project/upgrade_status) is your first line of defense. Install it on your current Drupal installation before beginning the upgrade process. It will scan all your custom and contributed modules and provide a detailed report of deprecations and incompatibilities. This report tells you exactly what needs to be fixed before you can safely upgrade to the next major version.
For automated code refactoring, consider using Rector with Drupal-specific rules. Rector can automatically update many common patterns of deprecated code, saving you significant manual work. While it won't catch everything and you'll still need to review all changes carefully, it dramatically speeds up the upgrade process for custom code.
The combination of Upgrade Status for detection and Rector for automated fixes provides a powerful workflow for modernizing your custom code. Run Upgrade Status to identify issues, apply Rector to fix common patterns automatically, then manually address any remaining compatibility problems that require human judgment.
Back to topThe Modern Admin Experience with GIN
While we're making significant changes to your Drupal installation, consider upgrading your administrative interface as well. The GIN admin theme has become the gold standard for modern Drupal backend interfaces. It provides a clean, intuitive experience that content editors love, with better accessibility, improved workflows, and a more contemporary design language than the default Claro theme.
GIN is actively maintained, highly compatible with Drupal 11, and works seamlessly with the entire ecosystem of administrative modules. Installing GIN as your default admin theme immediately after upgrading to Drupal 11 gives your team a fresh, productive environment to work in and demonstrates the modern capabilities of the platform to stakeholders.
Back to topThe Upgrade Process in Practice
Now that you understand all the key considerations, let's talk about the practical execution of the upgrade. Begin by creating a complete backup of your database and files. Then, set up a development environment that mirrors your production setup as closely as possible. Never attempt a major Drupal upgrade directly on production.
One of the most effective strategies for managing multi-step upgrades is to create dedicated git branches for each major version milestone. This approach gives you clean checkpoints that you can return to if something goes wrong, and it makes the upgrade process reproducible. Consider creating branches named something like d9.5, d10.5, and d11, each containing the composer.json configuration appropriate for that version. This way, switching between upgrade steps becomes as simple as checking out a different branch.
To make the process even more reliable and repeatable, consider codifying your upgrade steps in a Makefile. A Makefile allows you to document the exact sequence of commands needed for each upgrade step, ensuring consistency across multiple runs and making it easy for other team members to understand and replicate the process. Here's an example of what a Drupal 11 upgrade target might look like:
d11-upgrade:
	@echo "Starting Drupal upgrade process..."
	# Restore a clean database snapshot before starting
	ddev snapshot restore slim-db-before-d9.5
	# Switch to Drupal 9.5 branch
	git checkout d9.5
	ddev restart
	# Install dependencies without dev packages for cleaner testing
	ddev composer i --no-dev
	# Optional: Clear Redis cache if you're using it
	ddev redis FLUSHALL
	# Run database updates and configuration imports
	ddev drush deploy
	# Move to Drupal 10.5
	git checkout d10.5
	ddev restart
	ddev redis FLUSHALL
	ddev composer i
	ddev drush deploy
	# Finally upgrade to Drupal 11
	git checkout d11
	ddev restart
	ddev redis FLUSHALL
	ddev composer i
	ddev drush deploy
Notice how this approach uses database snapshots to ensure you can start fresh with each test run. This is particularly important when you're debugging upgrade issues and need to iterate quickly. The ddev snapshot restore command at the beginning returns your database to a known good state before any upgrade steps have run, which means you can execute this entire upgrade sequence repeatedly without manual database restoration.
Speaking of databases, if you're working with a large production database that contains thousands of nodes and takes significant time to upgrade, consider creating a slimmed-down version specifically for testing your upgrade process. You can accomplish this by deleting all content (nodes, taxonomy terms, media items) while preserving your content types, field configurations, and site structure. This "slim" database will upgrade much faster, allowing you to iterate on your upgrade script and test module compatibility without waiting hours for each test run. The command drush delete-all or SQL truncation of content tables can help create this testing database. Just remember that your final production upgrade will take longer since it's processing real content, so plan your maintenance window accordingly.
Start by upgrading to the highest version within your current major release using composer. Test thoroughly at this stage, as some contributed modules may behave differently even in minor version upgrades. Once you've verified stability, begin preparing for the jump to the next major version by addressing all the considerations we've discussed: module compatibility, CKEditor migration, admin theme changes, and custom code updates.
When you're ready to upgrade to the next major version, switch to the appropriate git branch which will update your composer.json to allow that version. Run composer install to get the new dependencies, then carefully follow any update hooks or manual steps documented in the release notes. After each major version upgrade, run database updates with drush deploy (which combines updb, config import, and cache rebuild), and thoroughly test all functionality before proceeding to the next step.
Document everything as you go. Note which modules required special handling, what custom code changes were necessary, and any unexpected issues you encountered. This documentation becomes invaluable when you need to perform the same upgrade on your staging and production environments, or when you need to troubleshoot issues that only appear after going live. Your Makefile itself serves as executable documentation, capturing the precise sequence of commands that led to a successful upgrade.
Back to topLet Experience Guide Your Upgrade
Upgrading through multiple Drupal major versions is not a weekend project. It requires planning, expertise, and careful execution. While this guide provides the roadmap, the actual journey involves numerous technical decisions and troubleshooting steps that benefit from experience.
iTech4Web has multiple years of experience upgrading Drupal sites of all sizes and complexity levels. We're official Drupal.org Drupal 7 Migration Partners, certified and trusted by the Drupal community. Our team has successfully guided dozens of projects through these exact upgrade paths, and we know how to anticipate and solve problems before they impact your timeline or budget. If you're planning a Drupal upgrade and want the confidence that comes with expert guidance, contact us. Let us leverage our experience to make your upgrade smooth, efficient, and successful.
The path from Drupal 8 or 9 to Drupal 11 is well-trodden, with established best practices and proven solutions for every challenge. By following this guide and seeking expert assistance when needed, you'll successfully modernize your Drupal installation and position your site for years of reliable operation on the latest platform.
Back to top